MoCap Studio A2&3
This short film is a group coursework for Motion Capture Studio.
Our team members are: Yaqi Cui, Xiaoqian Zheng, Xixun Zheng, Qinglin Lai, Siying Zheng, and me, Tom Zhou.
Instructor: Karen Kriss
MoCap actors: Vikhaash Sundararaj, Qinglin Lai.
Throughout the journey of creating this short film, I often felt as if I were witnessing something unique, something quite distinct from my own ways of expression, gradually taking shape bit by bit, as each of us brought our own unique brush to paint on a giant canvas, one stroke at a time.
⇲ MoodBoard and Visual Reference
After gathering for brainstorming sessions at school and holding our first online group meeting to plan the project timeline, our director, Yaqi, finalized the concept of “depicting body motions within a day” and created this mood board for reference. The film would be divided into three sections―morning, noon, and night.
Visually, the main character features a colorful, prism-like texture with intense reflections and refractions: the morning section would deliver some iridescent textures, the noon section would adopt a highly reflective, mirror-like style inspired by Hajime Sorayama, and the night section would resemble a shining prism under neon lights.
For my NPR-soaked (non-photorealistic) brain, this whole artistic direction has truly been an exciting new experience, one I might never have had the chance to explore if we weren’t working together.

↳ mood board by Yaqi
We chose Blender as our main DCC for stylization, camera movement, lighting, and final rendering; and for a lot of time, we gathered around in class, discussing and advising while watching our operator Yaqi fluently conjuring her Blender magic to manipulate and tweak different shaders during early-stage experimentation.
⇲ MoCap Planing
Absorbing elements from various dance pieces, the motion we designed to capture abstractly represents the dynamic states of a person’s daily life, from waking up to going to sleep. Yaqi drew a series of sketches, and Xixun wrote up a shot list to communicate with our mocap actor.
↳ sketches by Yaqi

↳ shot list by Xixun
Technically, we used two types of mocap methods in our final film: Optical Passive and AI Markerless. Despite the fact that AI models nowadays could already deliver fairly useable capture results conveniently and quite efficiently, we still decided to grasp the opportunity to primarily capture our motion data through the Vicon system setup at school, as we had been studying the workflow for a few weeks.
We did also conduct some experiments using AI mocap sites, saving them as a supplemental backup solution if needed later. Indeed, we used move.ai for the second noon part, since we later found the mocap data from the studio was not long enough.
↳ AI mocap trial with actor Qixin Hua
↳ passive optical mocap with actor Vikhaash
⇲ MoCap Data Processing
After receiving and inspecting the mocap data from our instructor, KK, we selected one take among others for the preferred actor performance. However, after I used MotionBuilder to retarget the animation to the main character rig we were using (a skinned low-poly primitive female human base mesh), a sudden backward twist appeared on the left leg of our rig after standing up and persisted in that awkward rotation for much of the rest of the clip.

I tried both the Gimbal Killer filter as well as the Unroll Rotations filter, but neither worked properly to fix the issue, so I had to manually tweak and adjust the animation during those affected keyframes. For the parts that our camera wouldn’t see, I left them as they were.
↳ AI mocap with actor Qinglin
For the AI mocap, our team members carried numerous experiments comparing different service providers, signing up with different emails for free credits : ) , and uploading shots from various angles. After getting the data, Qinglin, our actor himself, helped with retargeting, and Xiaoqian fixed all the unexpected mesh clipping by manually adjusting the keyframes of certain joints in Maya.
Later, we found out that, along with its convenience, AI mocap came the cost of unsteadiness in the motion: body shaking when viewed from angles other than the original shot, and foot sliding not just on the ground plane but also along the vertical axis. To mitigate these issues a bit, I applied a Butterworth filter along with some manual tweaks.
This data post-processing procedure reminded me of a video I saw earlier, in which a mocap animator commented during an interview that motion capture is not about entirely replacing animators’ jobs; most of the time, fixing and animating on top of the captured data is the norm.
⇲ Visuals
At first, when we were exploring the morning stage, Yaqi created a semi-transparent thin-film-like wrap covering the character using Shrinkwrap, while Qinglin suggested making it softer and silkier, as it was quite stiff, so I set up a Vellum cloth simulation and a dispersing particle effect in Houdini, then imported them into Blender via Alembic files.

↳ shrinkwrap trial
For the noon part, we initially planned to use multiple background textures switching constantly to somewhat emulate dancing through different spaces and to showcase the changing reflections on the character, with Qinglin taking photos to create HDRIs for that purpose. Unfortunately, it had been raining endlessly in Sydney this season, so instead we asked for some scenery photos he had taken earlier to see if we could make use of them.
↳ cloth and particle simulation
↳ deprecated custom HDRI dome
Apparently it’s not practicable to make an entire HDRI from one single-shot picture, so I came up with an idea of combining multiple images into one HDRI with some calculations:
From the Exif metadata, we knew the 135 full-frame equivalent focal length of each image; using the Pythagorean theorem, we could calculate the size of an imaginary sensor that matched the aspect ratio of the image while having a diagonal equal to that of a full-frame sensor; thus, we could compute the HFOV (horizontal field of view) and VFOV (vertical field of view) of each image using
and finally, we could determine the correct width and height proportions each image should occupy in the HDRI.
After aligning the horizon, four images were compiled into a single HDRI, and in Blender we could very conveniently switch the background by keying the z-axis rotation of the skydome texture coordinate.
Nevertheless, we abandoned this approach after seeing the test-rendered clip, as it was distracting and the character didn’t fit in with the environment. The camera movement in this section was wild, yet the background lacked parallax to support it, making it look like a flat PowerPoint slide playing behind the character.
Just as KK also pointed in the feedback, we changed to using a consistent background throughout the noon part. We found a city-view HDRI on Poly Haven, created a hemisphere mesh in Blender, and adjusted the texture mapping to minimize unnatural stretching. Along with a circular moving camera and dramatic zoom from a fisheye wide angle, an energetic and vivacious new noon part was created.
For the night part, Yaqi employed the Array modifier, Triangulate modifier, and the Glare node, in addition to the gorgeous prism-like material and multiple colorful point lights, to make the scene vivid and shining. She also made clever use of the Decimate modifier to gradually reduce the number of faces on the mesh, creating an interesting finale at the end of the film.
⇲ Music
Siying, Xiaoqian, Xixun, and Qinglin found a number of beautiful music pieces for our grand BGM election, and the winner was the string version of "Ain't It Fun" (original song by the band Paramore) performed by Vitamin String Quartet, nominated by Xiaoqian.
However, in order to better suit our project, some adjustments were desired. For instance, our group members wished for some crisp wind chime sound in the morning part, a smooth connection between the morning and noon sections, a bit buzzing FM feel in the noon part, and stronger sounds in the night part, preferably with additional drums or percussion.
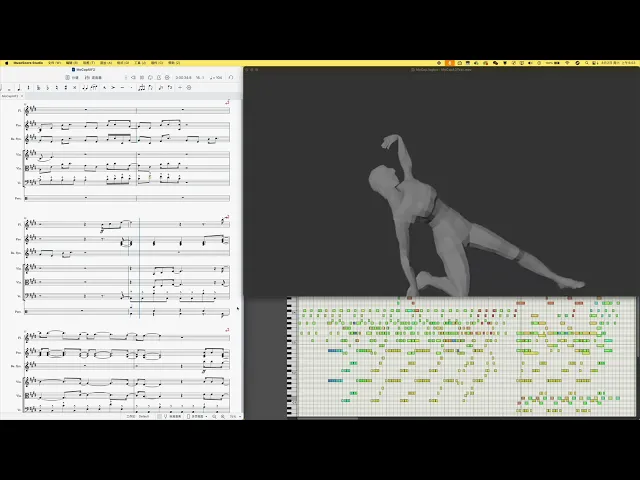
Therefore, I had taken this as a chance to practice rearrangement. I studied the original piano and vocal score, made slight modifications to match the pace and transitions of our film, and chose a synth bell sound that to some extent resembles a wind chime to play the arpeggiated chords throughout the piece.
↳ animatic with first version BGM
I used violin and viola for the melody, cello and double bass for staccato root notes – since we liked the string version of the song – flutes for the morning-to-noon transition and the night part melody, and wrote some simple percussion for the night section.
One major challenge in scoring a video is ensuring the music matches the visuals. Luckily, with a few small modifications, this piece was able to accompany our film content quite well.
⇲ Iterative Revisions
One bittersweet thing was that Yaqi and I are both, to some extent, detail maniacs. During the later stages of production, we intensively went through numerous revisions and re-renderings. Some of the issues we fixed included stuttering camera movements, unnatural texture stretching, feet gradually floating off the ground, shaky body motions, glare intensity, and more. These defects were all quite subtle, but we still went back and revised them again and again.
There was actually a funny moment during this iterative process. Siying arranged a render farm for us, but during the iterations, we discovered that, possibly due to the different Blender version used by the farm, the rendered images contained an excessively unintended amount of glare. So instead of relying on the farm, I handled the rendering tasks on my own desktop. However, for the noon part, I kind of missed the accidental defect produced by the farm, so we asked them to render that section at last using the same setup to recreate that serendipitous effect.

↳ image from the farm vs rendered by myself

↳ blender -b D:\ass2_sc003_02.blend -o D:\P3R\# -f 414 -f 431 -f 436 -f 439 -f 444 -f 445 -f 450 -f 457 …
When troubleshooting the flickering issue in the night part, I found the culprit to be a strange byproduct of using motion blur with Cycles. Turning off motion blur entirely would diminish the vivid, colorful look, and besides, the issue only appeared in some frames. To efficiently fix it, I picked out and recorded the affected frame numbers, used Blender command line to re-render those non-consecutive frames, and replaced the originals.
The hand-written credit slides at the end were crafted by Xiaoqian. As for the title, we deliberated for a long time. After brainstorming and consulting our GPT mentor, some of our favorite options included "Arc of Daylight", "Life in Motion", "Dawn Till Dusk", and "Sleepless Despairing Dancing Diva", etc… In the spirit of 'why not have it all', we used "Life in Motion|白昼弧線 (translated to 'Arc of Daylight')" as the title.
⇲ Final Thoughts
We are a great team! : )

⇢The End
⇢Tom's Journal
⇢Jul-Aug 2025
MoCap Studio A2&3
This short film is a group coursework for Motion Capture Studio.
Our team members are: Yaqi Cui, Xiaoqian Zheng, Xixun Zheng, Qinglin Lai, Siying Zheng, and me, Tom Zhou.
Instructor: Karen Kriss
MoCap actors: Vikhaash Sundararaj, Qinglin Lai.
Throughout the journey of creating this short film, I often felt as if I were witnessing something unique, something quite distinct from my own ways of expression, gradually taking shape bit by bit, as each of us brought our own unique brush to paint on a giant canvas, one stroke at a time.
⇲ MoodBoard and Visual Reference
After gathering for brainstorming sessions at school and holding our first online group meeting to plan the project timeline, our director, Yaqi, finalized the concept of “depicting body motions within a day” and created this mood board for reference. The film would be divided into three sections―morning, noon, and night.
Visually, the main character features a colorful, prism-like texture with intense reflections and refractions: the morning section would deliver some iridescent textures, the noon section would adopt a highly reflective, mirror-like style inspired by Hajime Sorayama, and the night section would resemble a shining prism under neon lights.
For my NPR-soaked (non-photorealistic) brain, this whole artistic direction has truly been an exciting new experience, one I might never have had the chance to explore if we weren’t working together.
↳ mood board by Yaqi
We chose Blender as our main DCC for stylization, camera movement, lighting, and final rendering; and for a lot of time, we gathered around in class, discussing and advising while watching our operator Yaqi fluently conjuring her Blender magic to manipulate and tweak different shaders during early-stage experimentation.
⇲ MoCap Planing
Absorbing elements from various dance pieces, the motion we designed to capture abstractly represents the dynamic states of a person’s daily life, from waking up to going to sleep. Yaqi drew a series of sketches, and Xixun wrote up a shot list to communicate with our mocap actor.
↳ sketches by Yaqi
↳ shot list by Xixun
Technically, we used two types of mocap methods in our final film: Optical Passive and AI Markerless. Despite the fact that AI models nowadays could already deliver fairly useable capture results conveniently and quite efficiently, we still decided to grasp the opportunity to primarily capture our motion data through the Vicon system setup at school, as we had been studying the workflow for a few weeks.
We did also conduct some experiments using AI mocap sites, saving them as a supplemental backup solution if needed later. Indeed, we used move.ai for the second noon part, since we later found the mocap data from the studio was not long enough.
↳ AI mocap trial with actor Qixin Hua
↳ passive optical mocap with actor Vikhaash
⇲ MoCap Data Processing
After receiving and inspecting the mocap data from our instructor, KK, we selected one take among others for the preferred actor performance. However, after I used MotionBuilder to retarget the animation to the main character rig we were using (a skinned low-poly primitive female human base mesh), a sudden backward twist appeared on the left leg of our rig after standing up and persisted in that awkward rotation for much of the rest of the clip.
I tried both the Gimbal Killer filter as well as the Unroll Rotations filter, but neither worked properly to fix the issue, so I had to manually tweak and adjust the animation during those affected keyframes. For the parts that our camera wouldn’t see, I left them as they were.
↳ AI mocap with actor Qinglin
For the AI mocap, our team members carried numerous experiments comparing different service providers, signing up with different emails for free credits : ) , and uploading shots from various angles. After getting the data, Qinglin, our actor himself, helped with retargeting, and Xiaoqian fixed all the unexpected mesh clipping by manually adjusting the keyframes of certain joints in Maya.
Later, we found out that, along with its convenience, AI mocap came the cost of unsteadiness in the motion: body shaking when viewed from angles other than the original shot, and foot sliding not just on the ground plane but also along the vertical axis. To mitigate these issues a bit, I applied a Butterworth filter along with some manual tweaks.
This data post-processing procedure reminded me of a video I saw earlier, in which a mocap animator commented during an interview that motion capture is not about entirely replacing animators’ jobs; most of the time, fixing and animating on top of the captured data is the norm.
⇲ Visuals
At first, when we were exploring the morning stage, Yaqi created a semi-transparent thin-film-like wrap covering the character using Shrinkwrap, while Qinglin suggested making it softer and silkier, as it was quite stiff, so I set up a Vellum cloth simulation and a dispersing particle effect in Houdini, then imported them into Blender via Alembic files.
↳ shrinkwrap trial
For the noon part, we initially planned to use multiple background textures switching constantly to somewhat emulate dancing through different spaces and to showcase the changing reflections on the character, with Qinglin taking photos to create HDRIs for that purpose. Unfortunately, it had been raining endlessly in Sydney this season, so instead we asked for some scenery photos he had taken earlier to see if we could make use of them.
↳ cloth and particle simulation
↳ deprecated custom HDRI dome
Apparently it’s not practicable to make an entire HDRI from one single-shot picture, so I came up with an idea of combining multiple images into one HDRI with some calculations:
From the Exif metadata, we knew the 135 full-frame equivalent focal length of each image; using the Pythagorean theorem, we could calculate the size of an imaginary sensor that matched the aspect ratio of the image while having a diagonal equal to that of a full-frame sensor; thus, we could compute the HFOV (horizontal field of view) and VFOV (vertical field of view) of each image using
and finally, we could determine the correct width and height proportions each image should occupy in the HDRI.
After aligning the horizon, four images were compiled into a single HDRI, and in Blender we could very conveniently switch the background by keying the z-axis rotation of the skydome texture coordinate.
Nevertheless, we abandoned this approach after seeing the test-rendered clip, as it was distracting and the character didn’t fit in with the environment. The camera movement in this section was wild, yet the background lacked parallax to support it, making it look like a flat PowerPoint slide playing behind the character.
Just as KK also pointed in the feedback, we changed to using a consistent background throughout the noon part. We found a city-view HDRI on Poly Haven, created a hemisphere mesh in Blender, and adjusted the texture mapping to minimize unnatural stretching. Along with a circular moving camera and dramatic zoom from a fisheye wide angle, an energetic and vivacious new noon part was created.
For the night part, Yaqi employed the Array modifier, Triangulate modifier, and the Glare node, in addition to the gorgeous prism-like material and multiple colorful point lights, to make the scene vivid and shining. She also made clever use of the Decimate modifier to gradually reduce the number of faces on the mesh, creating an interesting finale at the end of the film.
⇲ Music
Siying, Xiaoqian, Xixun, and Qinglin found a number of beautiful music pieces for our grand BGM election, and the winner was the string version of "Ain't It Fun" (original song by the band Paramore) performed by Vitamin String Quartet, nominated by Xiaoqian.
However, in order to better suit our project, some adjustments were desired. For instance, our group members wished for some crisp wind chime sound in the morning part, a smooth connection between the morning and noon sections, a bit buzzing FM feel in the noon part, and stronger sounds in the night part, preferably with additional drums or percussion.
Therefore, I had taken this as a chance to practice rearrangement. I studied the original piano and vocal score, made slight modifications to match the pace and transitions of our film, and chose a synth bell sound that to some extent resembles a wind chime to play the arpeggiated chords throughout the piece.
↳ animatic with first version BGM
I used violin and viola for the melody, cello and double bass for staccato root notes – since we liked the string version of the song – flutes for the morning-to-noon transition and the night part melody, and wrote some simple percussion for the night section.
One major challenge in scoring a video is ensuring the music matches the visuals. Luckily, with a few small modifications, this piece was able to accompany our film content quite well.
⇲ Iterative Revisions
One bittersweet thing was that Yaqi and I are both, to some extent, detail maniacs. During the later stages of production, we intensively went through numerous revisions and re-renderings. Some of the issues we fixed included stuttering camera movements, unnatural texture stretching, feet gradually floating off the ground, shaky body motions, glare intensity, and more. These defects were all quite subtle, but we still went back and revised them again and again.
There was actually a funny moment during this iterative process. Siying arranged a render farm for us, but during the iterations, we discovered that, possibly due to the different Blender version used by the farm, the rendered images contained an excessively unintended amount of glare. So instead of relying on the farm, I handled the rendering tasks on my own desktop. However, for the noon part, I kind of missed the accidental defect produced by the farm, so we asked them to render that section at last using the same setup to recreate that serendipitous effect.
↳ image from the farm vs rendered by myself
↳ blender -b D:\ass2_sc003_02.blend -o D:\P3R\# -f 414 -f 431 -f 436 -f 439 -f 444 -f 445 -f 450 -f 457 …
When troubleshooting the flickering issue in the night part, I found the culprit to be a strange byproduct of using motion blur with Cycles. Turning off motion blur entirely would diminish the vivid, colorful look, and besides, the issue only appeared in some frames. To efficiently fix it, I picked out and recorded the affected frame numbers, used Blender command line to re-render those non-consecutive frames, and replaced the originals.
The hand-written credit slides at the end were crafted by Xiaoqian. As for the title, we deliberated for a long time. After brainstorming and consulting our GPT mentor, some of our favorite options included "Arc of Daylight", "Life in Motion", "Dawn Till Dusk", and "Sleepless Despairing Dancing Diva", etc… In the spirit of 'why not have it all', we used "Life in Motion|白昼弧線 (translated to 'Arc of Daylight')" as the title.
⇲ Final Thoughts
We are a great team! : )
⇢The End
⇢Tom's Journal
⇢Jul-Aug 2025
⇢swipe or scroll⇢